From tedious to automated
“Please remember to update your hours in Clockify.”
If that sounds like a Slack message you’ve received before, you’re in the right place. If not, let me introduce you to the tool that changed how I track time: Auto Clock.
Working at outsourcing companies usually means tracking hours with tools such as Clockify or Toggl. If you’re anything like me, you probably forget to log those hours every single time.
After months of being reminded to do the most tedious part of my job, I did what any developer in my position would do: I spent an entire weekend overengineering a solution instead of simply becoming more responsible.
Two years earlier, Auto Clock began as a small NestJS cron job. By 2024, it had evolved into a NestJS cron job plus an almost user-friendly interface.
Here’s how that version worked.
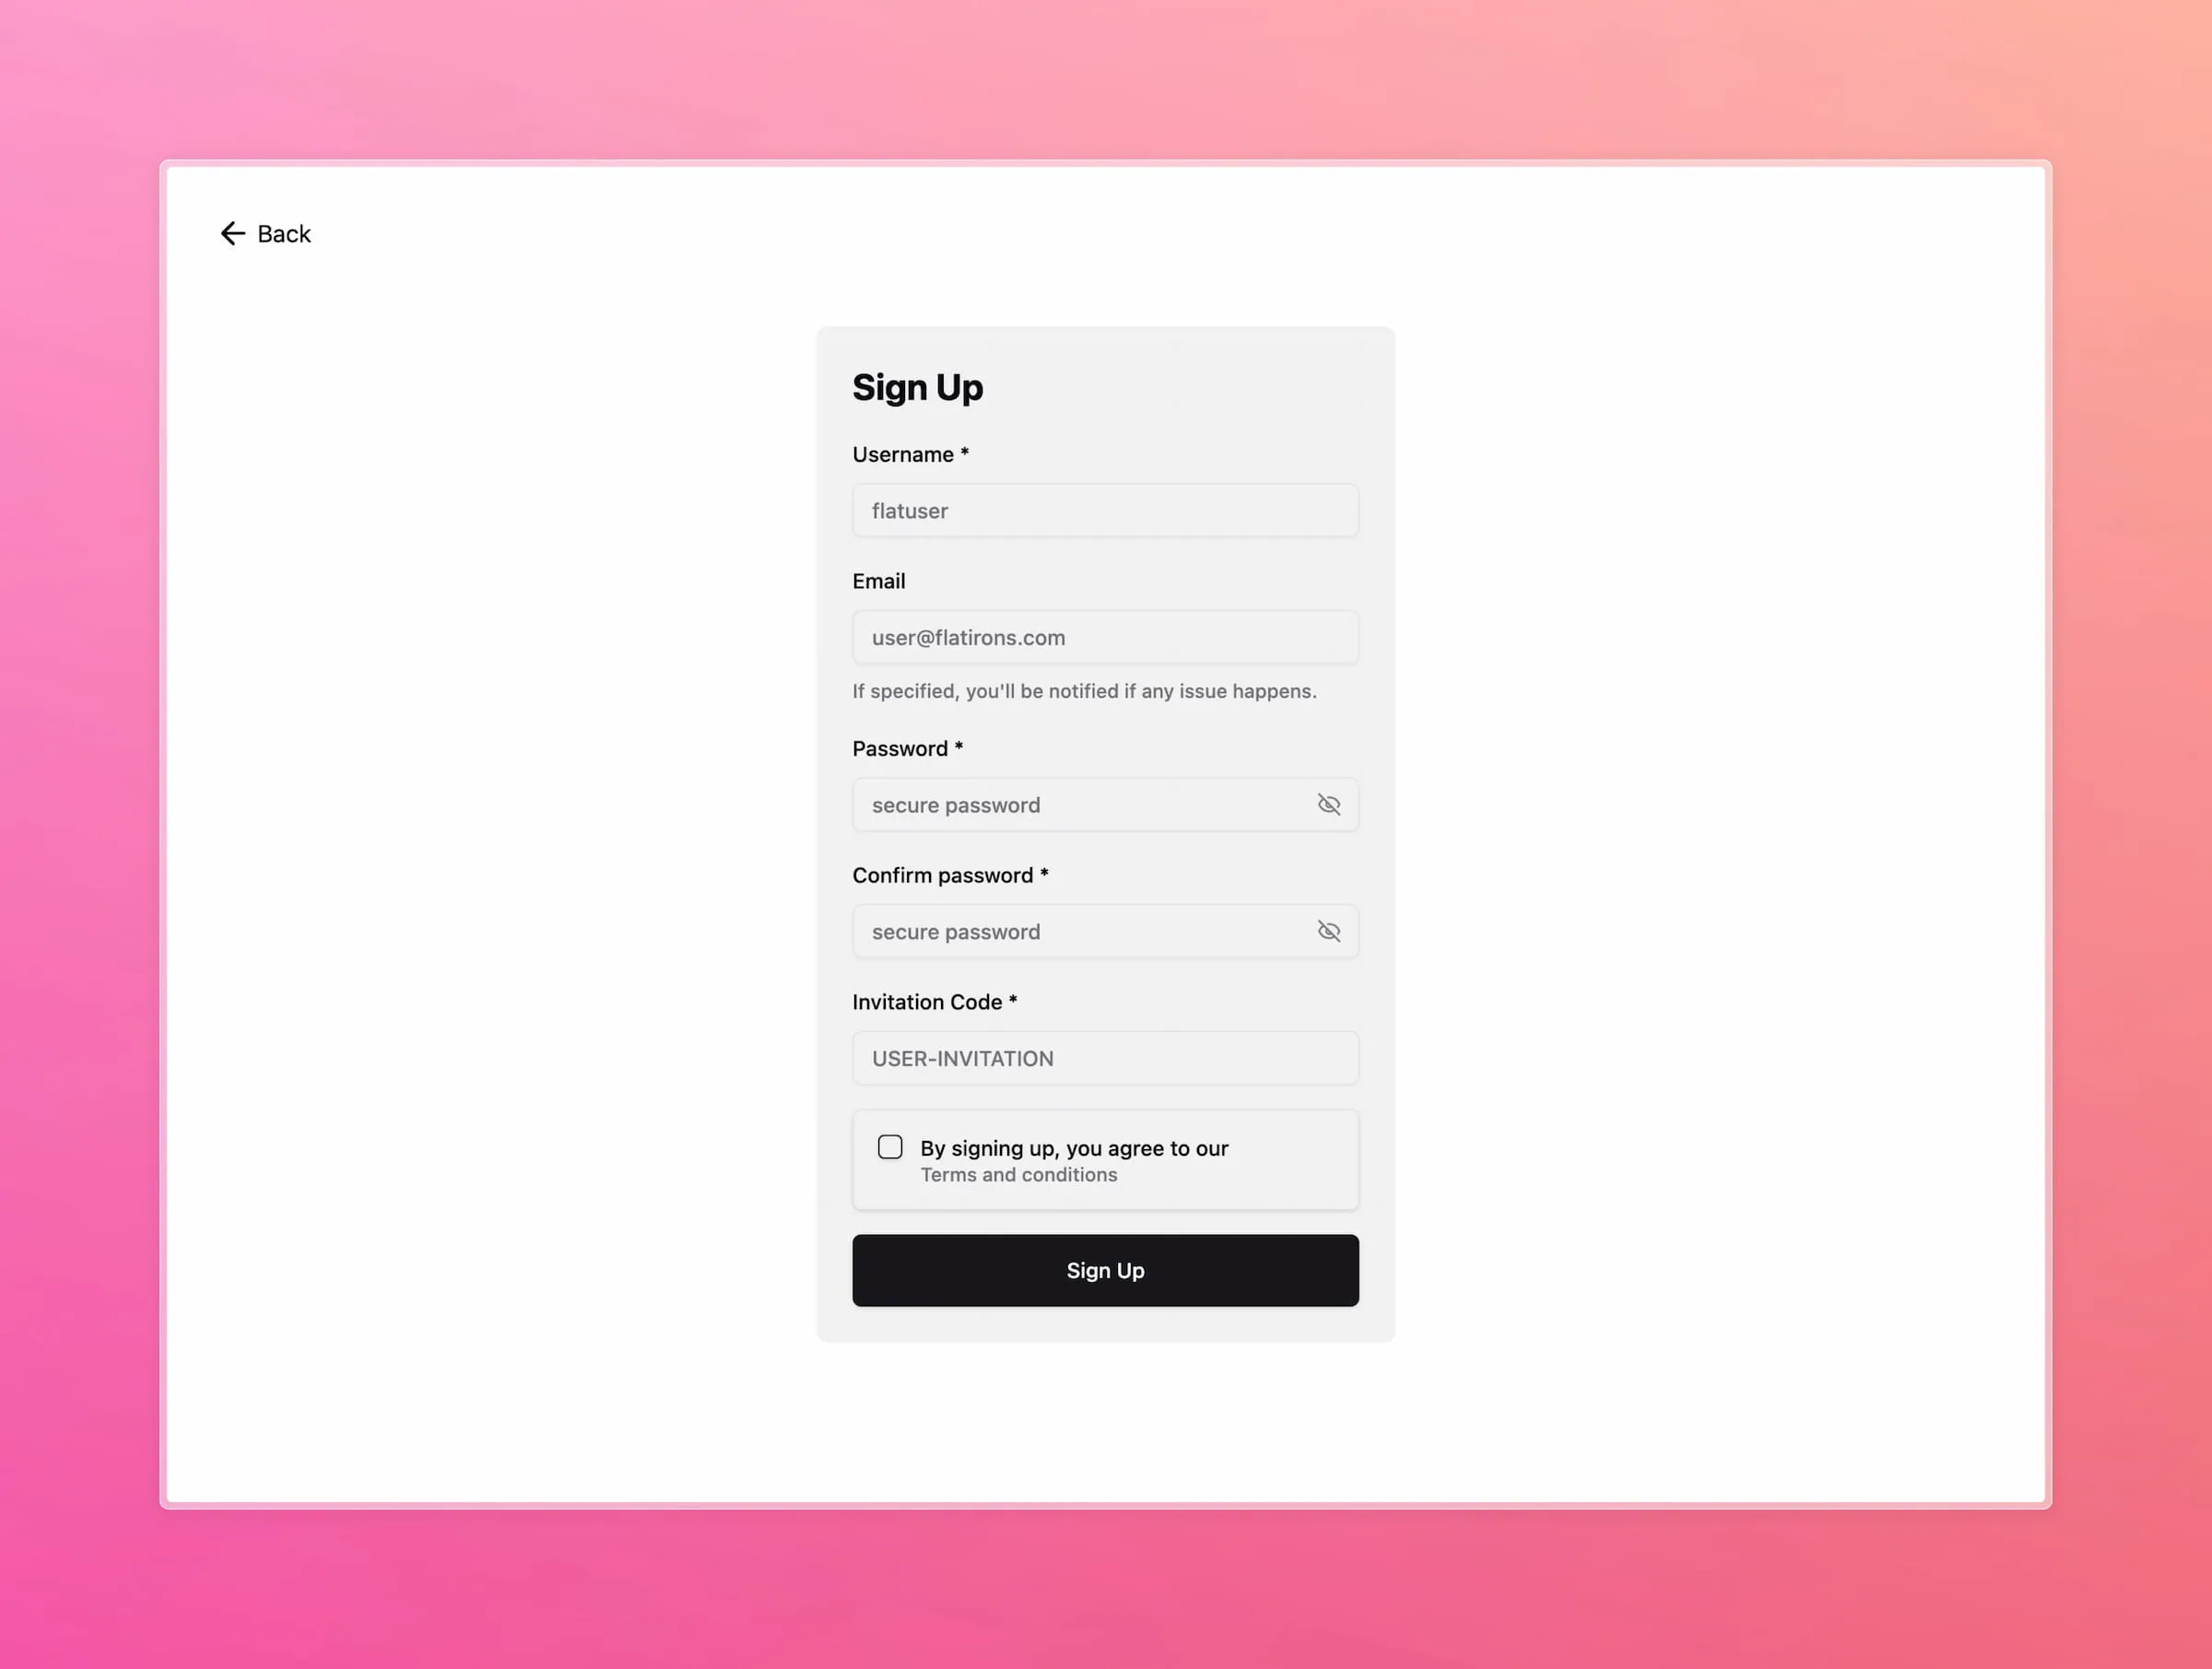
1. Create an account
The early hosted release was invitation-only. New users needed an invitation code to create an account; everyone else could join the waiting list.
2. Create a clock
After signing in, the left navigation opened the New Clock screen.
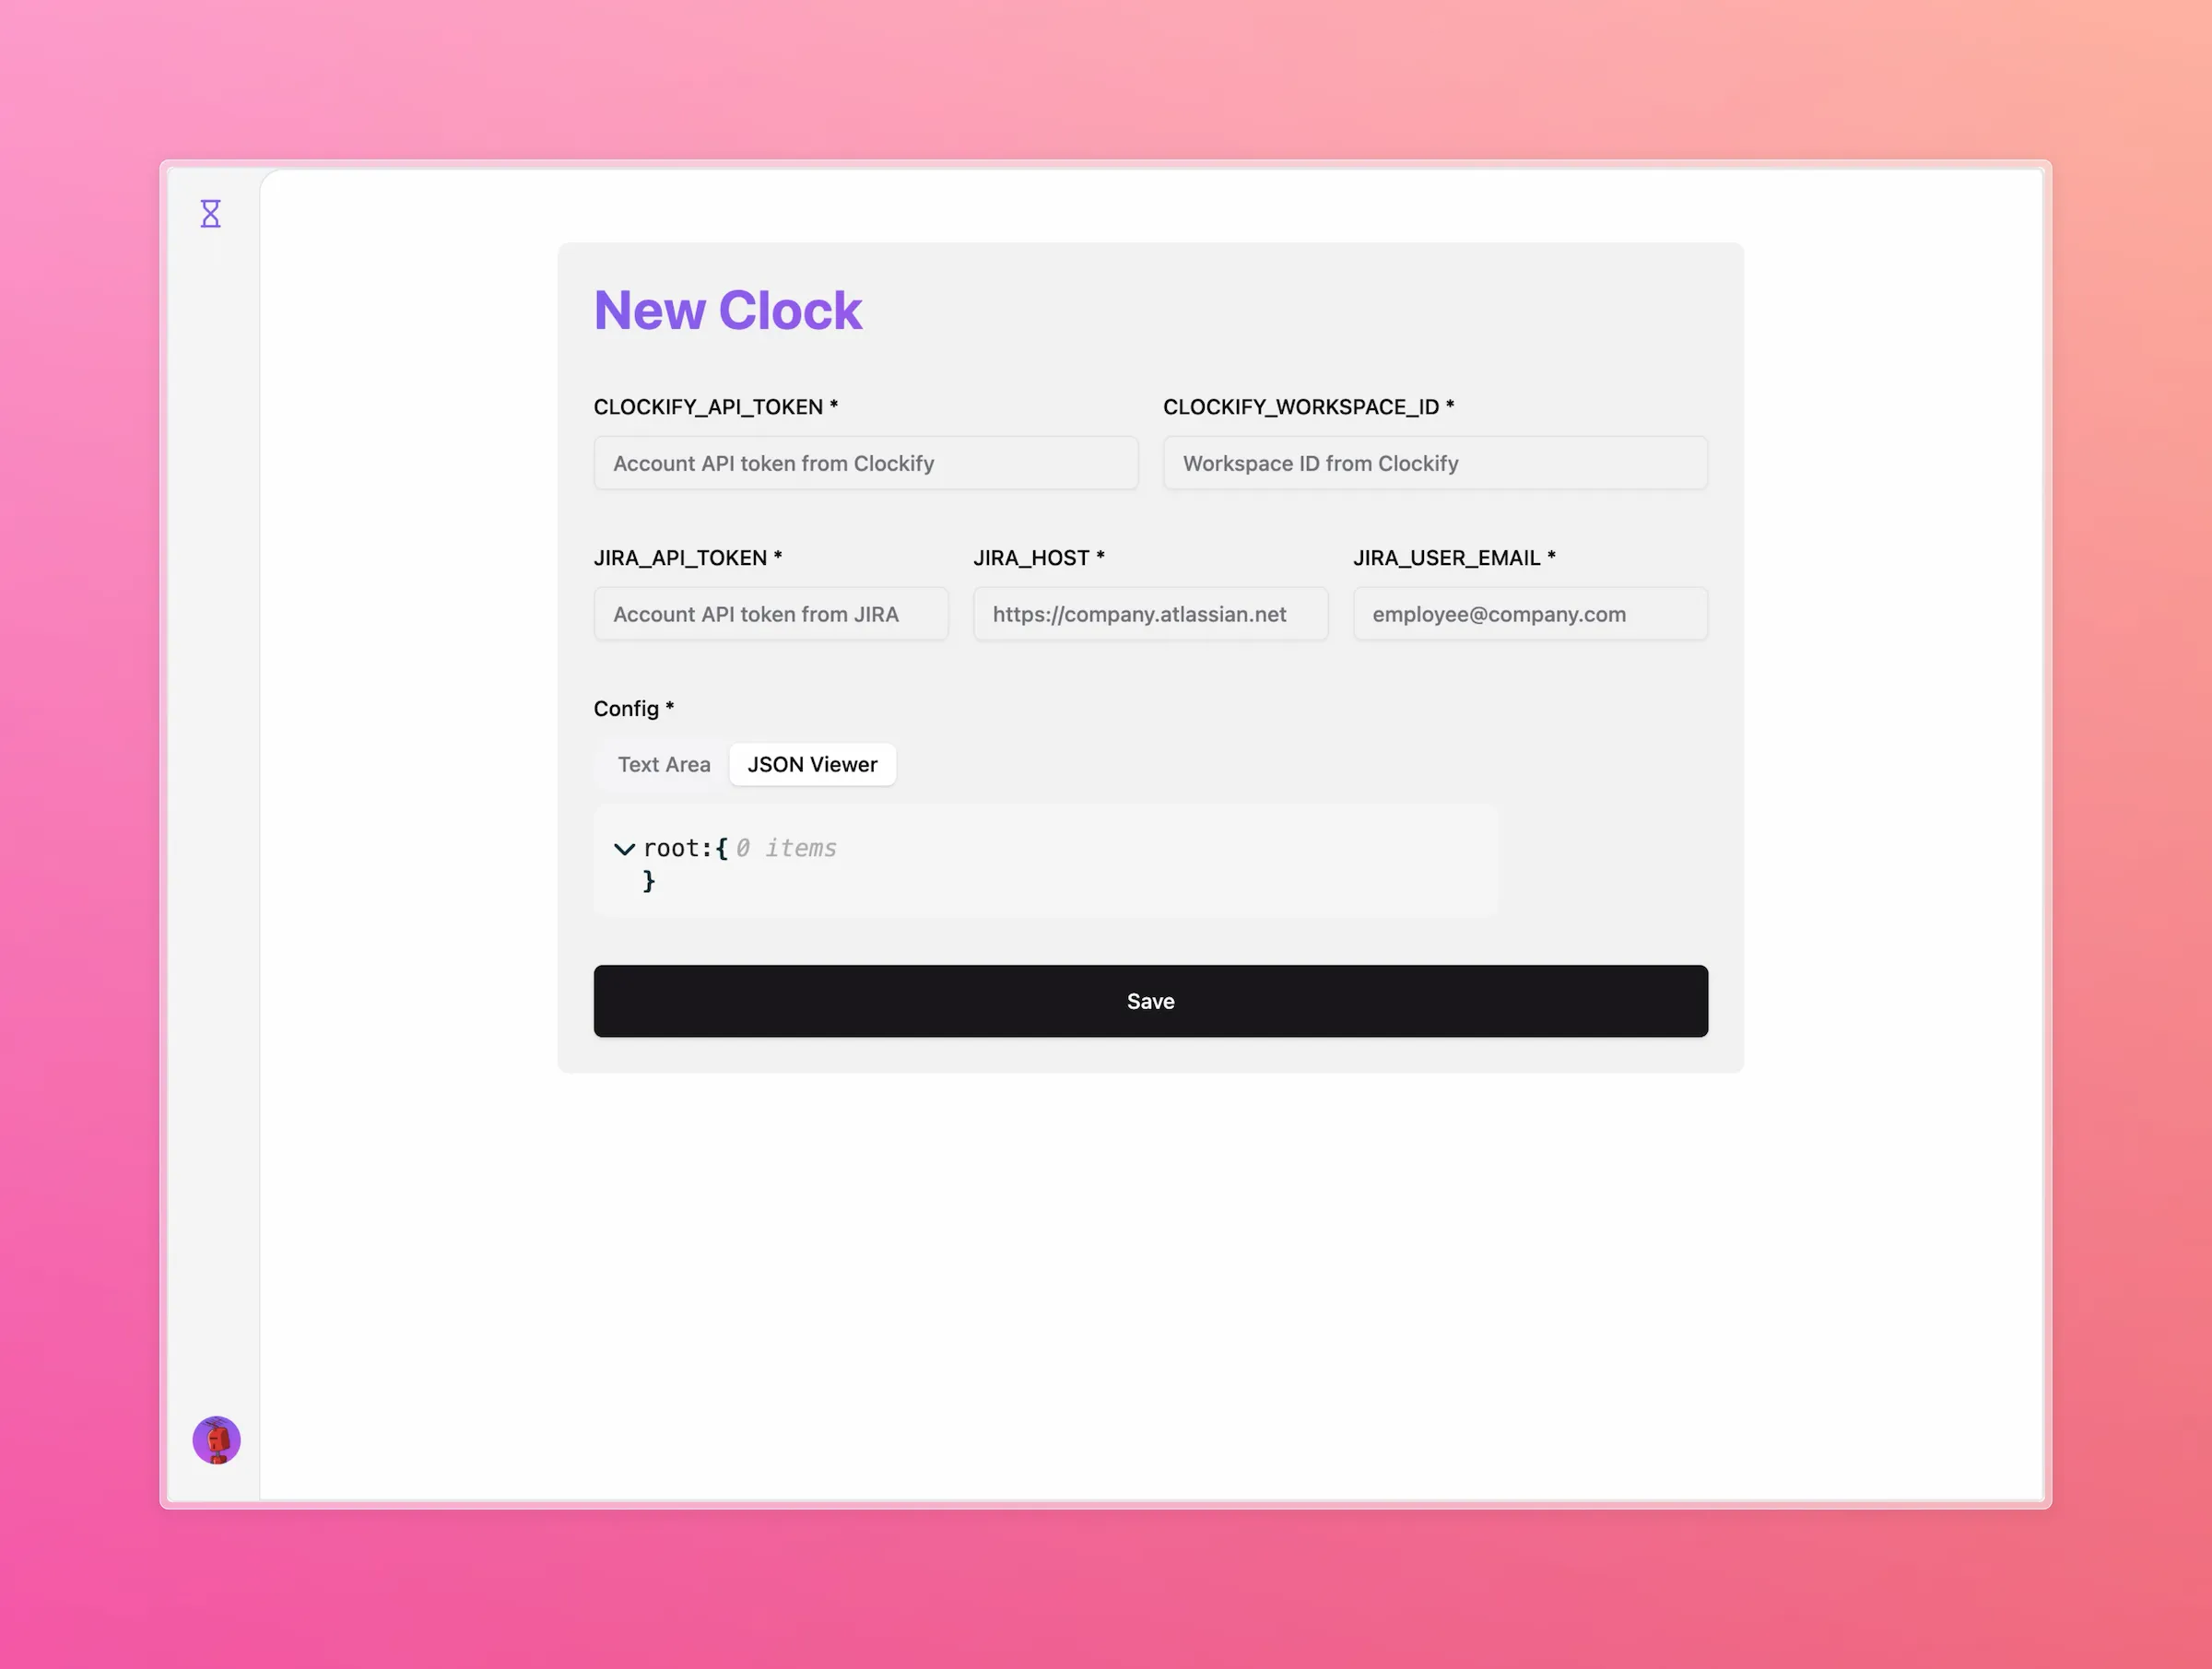
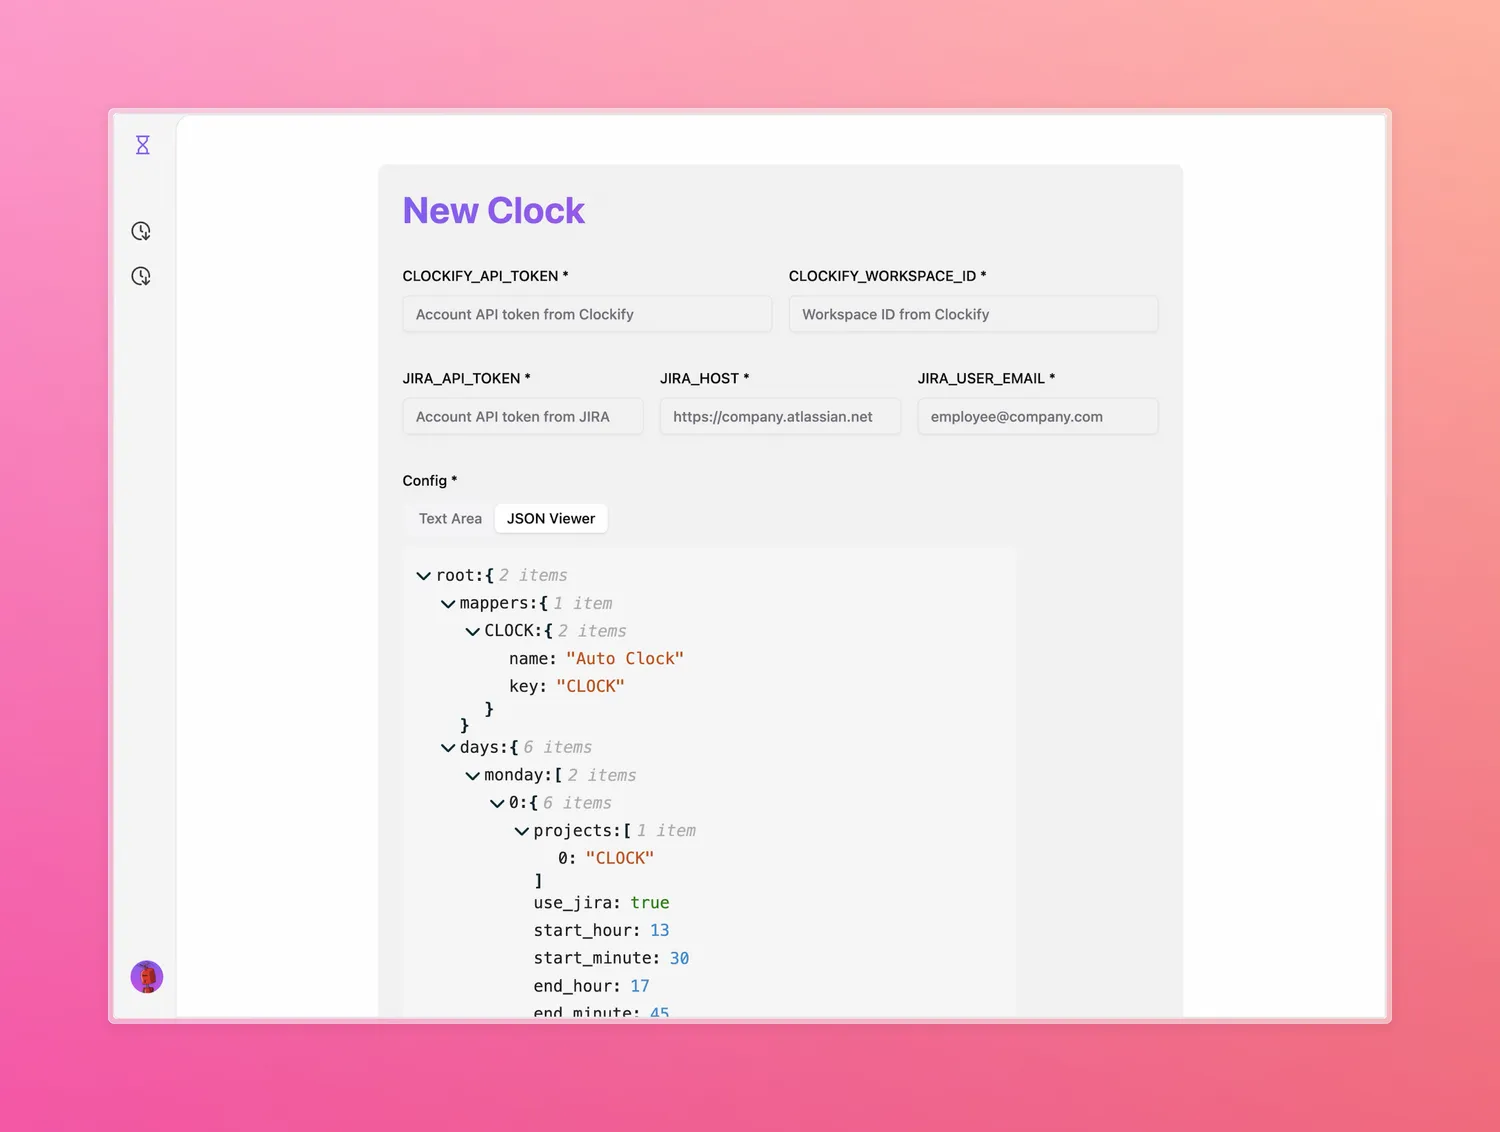
The integration required:
CLOCKIFY_API_TOKEN: an API token from the Clockify account.CLOCKIFY_WORKSPACE_ID: selected after the Clockify token loaded its available workspaces.JIRA_API_TOKEN: an Atlassian API token.JIRA_HOST: the Jira site domain, such ashttps://company.atlassian.net.JIRA_USER_EMAIL: the email address used by the Jira account.
Automation was still a little manual. The configuration started in the text editor, then the JSON viewer provided a friendlier way to inspect its structure.
Map Jira work to Clockify
The mappers object connected Jira project keys to Clockify project names. A weekday schedule then referenced those mapper keys.
1  {
2    "mappers": {
3      "JIRA": {
4        "name": "Clockify Project Name",
5        "key": "JIRA"
6      }
7    }
8  }
Each mapper has two values:
name: the destination project name in Clockify.key: the Jira project key used by a scheduled shift.
The days object defines the workweek. Day names are lowercase, and each day contains a list of shifts:
projects: mapper keys associated with the shift. The early version supported one project at a time.use_jira: uses current in-progress Jira tickets as the Clockify entry title. At the time,truewas the only supported value.start_hourandend_hour: hours in 24-hour time, from0to23.start_minuteandend_minute: minutes from0to59.
Once saved, every configured day was logged at 6 PM in the America/New_York timezone.
What was next?
The roadmap for the early release included:
- Logging time without requiring Jira tickets.
- A configurable daily execution time.
- Email notifications for failures and account events.
- Password recovery and account deletion.
- A schedulable vacation mode.
- A friendlier configuration builder with Jira OAuth.
- Additional sources such as Monday.com, ClickUp, Trello, and Notion.
- Additional destinations such as Toggl, Plaky, and IFTTT webhooks.
- A history view for generated time entries.
Auto Clock started as a shortcut for one repetitive task, but the interface revealed the larger idea: a configurable bridge between where work happens and where time must be reported.