In the previous post, we talked about how to create an online portfolio. In this one, we’ll make it public.
What will you need?
You’ll need Git, a GitHub account, and a candy bar.
Configure the project
Create the GitHub repository
-
For free GitHub Pages hosting, the repository needed to be public when this guide was written.
-
Create a
.gitignorefile:touch .gitignore -
Add the following content:
# npm node_modules *.log *.gz # Coveralls .nyc_output coverage # Benchmarking benchmarks/graphs # Cypress cypress/screenshots/* cypress/videos/* -
Initialize the local repository and connect it to GitHub:
git init
git add .
git commit -m "Create portfolio project"
git branch -M main
git remote add origin git@github.com:username/project.git
git push -u origin main
Replace
git@github.com:username/project.gitwith your repository’s URL.
Configure GitHub Pages
Open the repository on GitHub, then follow GitHub’s guide to configure a publishing source.
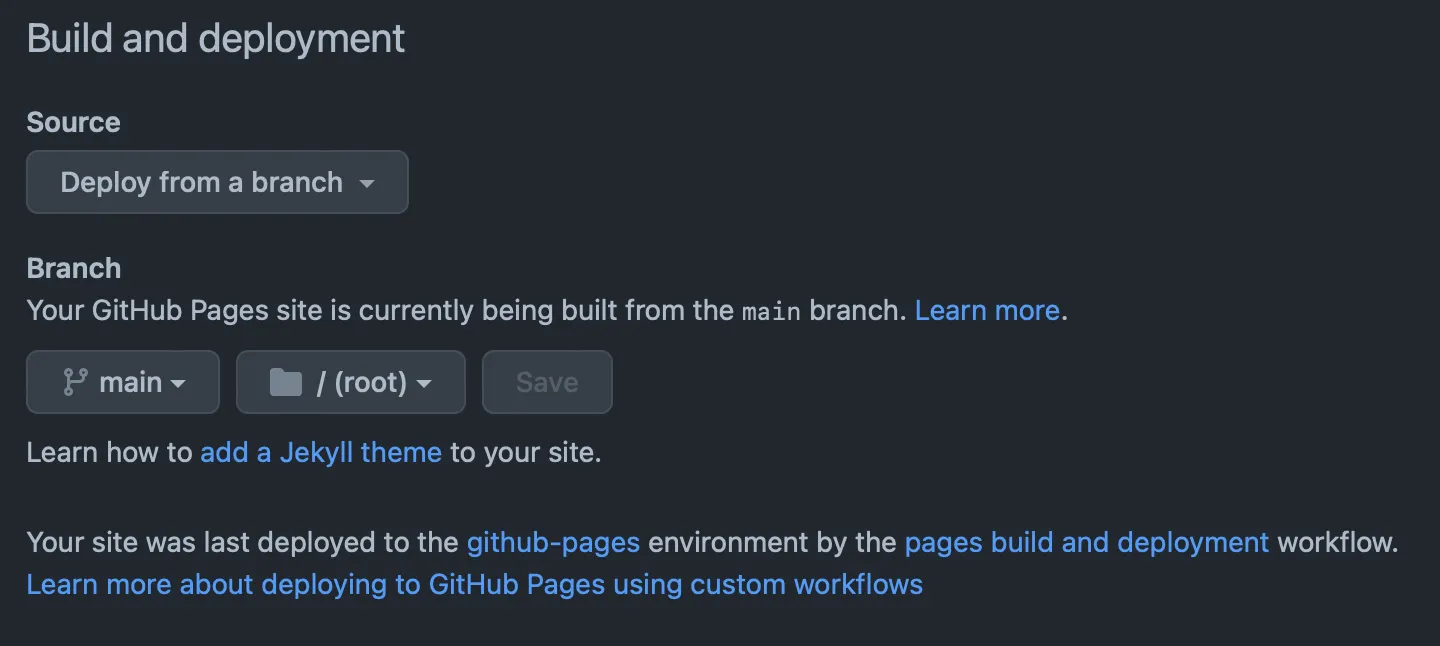
Once the deployment finishes, the site will be available at an address resembling:
https://your-user.github.io/project-repository/Publish new changes
If you’re not familiar with Git, you’ll need to push to the main branch whenever you want your latest changes to go live.
You can learn more in GitHub’s introduction to using Git. The short version is:
git add .
git commit -m "Publish new changes"
git push origin main
Cover photograph by Roman Synkevych.